Sharpen edges with an unsharp mask
Subtract a smoothed image to isolate detail, then add a controlled amount of that detail back.
The pipeline
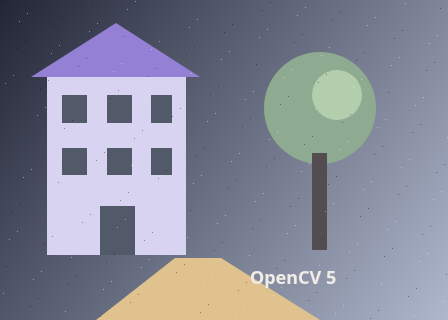
The unchanged source image. All steps use this same example.

The low-frequency layer used by the unsharp mask.
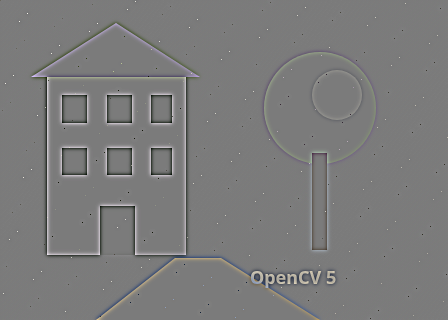
Original minus smooth image, normalized for display; inspect signed native values.
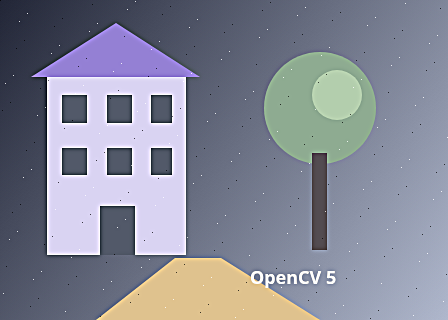
Final output of the complete chain.
Estimate the smooth image
Explore the algorithm →GaussianBlurGaussian blur removes high-frequency detail.
- Receives
- The original colour image.
- Passes to the next step
- A smooth low-frequency colour layer.
Why this step? Gaussian blur estimates the slowly varying part of the image. Its sigma chooses which spatial scales are treated as detail: a small sigma isolates fine changes, while a larger sigma includes broader edge transitions.
Extract signed detail
Explore the algorithm →Mat.convertTosubtractSubtract the blur from the original in floating point.
- Receives
- Original and smooth layers in float32.
- Passes to the next step
- A signed detail layer: detail = original - smooth.
Why this step? Subtracting smooth from original yields positive and negative detail. Float32 preserves the negative lobes that unsigned subtraction would clip. The normalized preview shows their shape, while the pixel inspector retains their signed values.
Add the detail back
Explore the algorithm →addWeightedWeighted addition sharpens the output.
- Receives
- The original and smooth colour images.
- Produces
- A sharpened colour image with contrast increased around details.
Why this step? The equivalent formula original + amount × detail becomes (1 + amount) × original - amount × smooth. addWeighted performs that combination into the final 8-bit image, where out-of-range values saturate.
Actual OpenCV 5.0.0 results on the illustrated sample, using the lab’s default algorithm settings. Masks, overlays and normalized fields are labelled previews; the data contracts above describe what the algorithms really exchange. Try this chain with your images ↓
Why this chain works
Sharpening can be understood as amplifying the difference between an image and a smooth version of itself. That difference contains edges and fine texture, along with noise.
- 01
Estimate the smooth image
GaussianBlurGaussian blur estimates the slowly varying part of the image. Its sigma chooses which spatial scales are treated as detail: a small sigma isolates fine changes, while a larger sigma includes broader edge transitions.
- Receives
- The original colour image.
- Passes on
- A smooth low-frequency colour layer.
- 02
Extract signed detail
Mat.convertTosubtractSubtracting smooth from original yields positive and negative detail. Float32 preserves the negative lobes that unsigned subtraction would clip. The normalized preview shows their shape, while the pixel inspector retains their signed values.
- Receives
- Original and smooth layers in float32.
- Passes on
- A signed detail layer: detail = original - smooth.
- 03
Add the detail back
addWeightedThe equivalent formula original + amount × detail becomes (1 + amount) × original - amount × smooth. addWeighted performs that combination into the final 8-bit image, where out-of-range values saturate.
- Receives
- The original and smooth colour images.
- Passes on
- A sharpened colour image with contrast increased around details.
Tune and diagnose
Choose the parameters
Set sigma for the width of detail you want to emphasize, then adjust amount. At amount zero the output should reproduce the original. Denoise beforehand if grain dominates the detail layer.
Read the result
Inspect strong edges for bright and dark halos and inspect smooth regions for amplified noise. Large amounts can clip highlights and shadows; stronger local contrast is not recovered information.
Try it with your images
Choose your own image or start with the built-in sample. Run the recipe, then use the stage buttons to inspect intermediate results without rerunning it.
Experiment at pixel level
Subtract a smoothed image to isolate detail, then add a controlled amount of that detail back.
The engine loads on your first run. Your images stay in this browser.
Scroll over either image to zoom at the pointer. Use the scrollbars to pan both views over the same relative area. Zoom is relative to the input; pixel coordinates belong to each image. Warps can change scene correspondence.
Pixel inspector RGBA · native values · matched scale · 9 × 9 output pixels
Select a pixel
Select a pixel
Assumptions and limits
High amounts create halos and amplify noise. The display clamps final values to 8-bit colour.
TypeScript core chain
Initialize the shared engine once with await initOpenCV(), then use these named imports. In a bundled browser app, pass the WASM URL as shown in the quickstart. image is an 8-bit BGR Mat from that same engine; paired recipes receive an equally sized nextImage. Region recipes use an in-bounds pixel rect. Read outputs before the using scope ends. See matrix ownership.
import {
  GaussianBlur,
  Mat,
  addWeighted
} from '@banou/opencv-wasm'

// The engine is already initialized; image is an 8-bit BGR Mat.
// "using" releases native handles at scope exit; inspect or copy outputs before then.

// Allocate a smooth reference and an independent sharpened output.
using blurred = new Mat(), output = new Mat()
// 1. A sigma-2 blur removes fine variation; zero kernel size is chosen from sigma.
// The difference between original and blur is the signed detail we want to amplify.
GaussianBlur(image, blurred, { width: 0, height: 0 }, 2)
// 2. Add one extra copy of that detail. Zero would leave the original unchanged.
const amount = 1
// original + amount*(original - blurred) equals
// (1 + amount)*original - amount*blurred. The zero adds no brightness offset.
// The 8-bit result saturates to 0..255; large amounts amplify noise and create halos.
addWeighted(image, 1 + amount, blurred, -amount, 0, output)
The snippets isolate the core operations. The complete runnable recipes also include validation, filtering, overlays, intermediate previews and resource cleanup.