Select and group a colour
Select an HSV colour range, close small holes and outline matching colour regions.
The pipeline
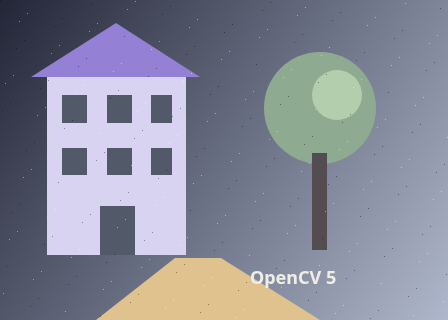
The unchanged source image. All steps use this same example.
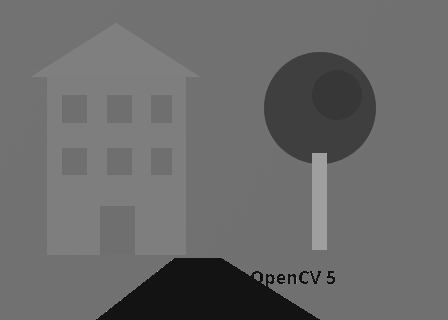
Grayscale displays the numeric hue code, 0 to 179. Brightness here represents hue, not scene brightness; low-saturation pixels have unreliable hue.
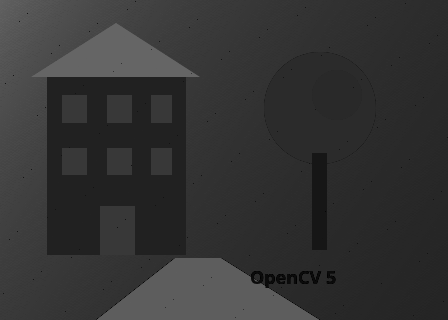
Bright pixels have stronger colour saturation. The saturation floor prevents gray pixels from entering the hue selection.
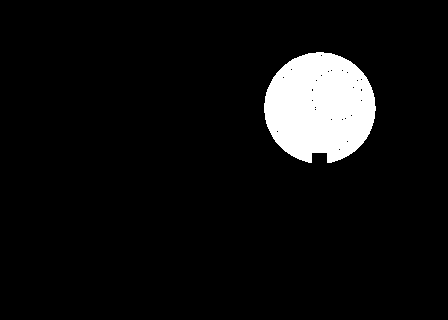
White pixels satisfy the hue, saturation and brightness interval.
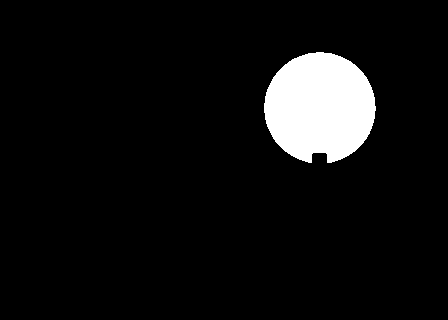
Closing fills small holes in the colour selection.
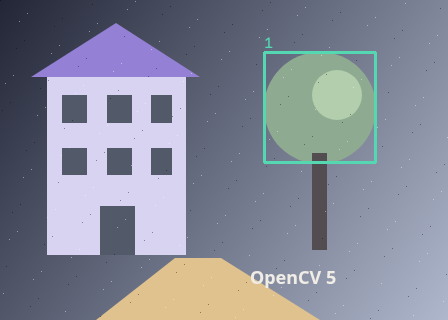
1 regions retained from 1 foreground components.
Convert BGR to HSV
Explore the algorithm →cvtColorCOLOR_BGR2HSVSeparate hue from brightness.
- Receives
- An 8-bit BGR image.
- Passes to the next step
- An 8-bit HSV image; hue is encoded on 0..179.
Why this step? HSV gives separate channels for hue, saturation and value. A hue interval is easier to specify than three independent BGR intervals, while a saturation floor excludes gray pixels whose hue is unstable or uninformative.
Select the colour interval
Explore the algorithm →inRangeApply hue and saturation bounds.
- Receives
- HSV pixels and lower/upper bounds.
- Passes to the next step
- A binary colour-selection mask.
Why this step? Range testing makes the colour definition explicit. This lab selects one contiguous hue interval and a minimum saturation while allowing the full value range. Every passing pixel becomes white; all others become black.
Clean and group the selection
Explore the algorithm →morphologyExMORPH_CLOSEconnectedComponentsWithStatsMorphology and connected components turn pixels into regions.
- Receives
- The colour mask.
- Produces
- Colour-region boxes and component IDs.
Why this step? Closing fills small holes and joins small gaps within the selection. Component statistics then turn selected pixels into area-filtered boxes. They group by connectivity, so adjacent objects of the same colour may merge.
Actual OpenCV 5.0.0 results on the illustrated sample, using the lab’s default algorithm settings. Masks, overlays and normalized fields are labelled previews; the data contracts above describe what the algorithms really exchange. Try this chain with your images ↓
Why this chain works
Colour can separate objects that overlap in brightness. Select a colour in a representation that separates hue from intensity, then convert scattered selected pixels into contiguous regions.
- 01
Convert BGR to HSV
cvtColorCOLOR_BGR2HSVHSV gives separate channels for hue, saturation and value. A hue interval is easier to specify than three independent BGR intervals, while a saturation floor excludes gray pixels whose hue is unstable or uninformative.
- Receives
- An 8-bit BGR image.
- Passes on
- An 8-bit HSV image; hue is encoded on 0..179.
- 02
Select the colour interval
inRangeRange testing makes the colour definition explicit. This lab selects one contiguous hue interval and a minimum saturation while allowing the full value range. Every passing pixel becomes white; all others become black.
- Receives
- HSV pixels and lower/upper bounds.
- Passes on
- A binary colour-selection mask.
- 03
Clean and group the selection
morphologyExMORPH_CLOSEconnectedComponentsWithStatsClosing fills small holes and joins small gaps within the selection. Component statistics then turn selected pixels into area-filtered boxes. They group by connectivity, so adjacent objects of the same colour may merge.
- Receives
- The colour mask.
- Passes on
- Colour-region boxes and component IDs.
Tune and diagnose
Choose the parameters
Use the pixel inspector and HSV guide to choose the hue interval. Raise minimum saturation to reject pale or gray regions. Use a small closing kernel. A red interval spanning the hue wrap needs two inRange masks joined with bitwise_or in your own chain.
Read the result
Inspect the raw mask before cleanup: morphology cannot rescue an incorrect colour range. Illumination, reflections and white balance can shift colours beyond fixed bounds.
Try it with your images
Choose your own image or start with the built-in sample. Run the recipe, then use the stage buttons to inspect intermediate results without rerunning it.
Experiment at pixel level
Select an HSV colour range, close small holes and outline matching colour regions.
The engine loads on your first run. Your images stay in this browser.
Scroll over either image to zoom at the pointer. Use the scrollbars to pan both views over the same relative area. Zoom is relative to the input; pixel coordinates belong to each image. Warps can change scene correspondence.
Pixel inspector RGBA · native values · matched scale · 9 × 9 output pixels
Select a pixel
Select a pixel
Assumptions and limits
HSV hue is 0..179. Red may wrap across zero and need two intervals; this recipe demonstrates one contiguous interval.
TypeScript core chain
Initialize the shared engine once with await initOpenCV(), then use these named imports. In a bundled browser app, pass the WASM URL as shown in the quickstart. image is an 8-bit BGR Mat from that same engine; paired recipes receive an equally sized nextImage. Region recipes use an in-bounds pixel rect. Read outputs before the using scope ends. See matrix ownership.
import {
  COLOR_BGR2HSV,
  CV_8UC3,
  MORPH_CLOSE,
  MORPH_ELLIPSE,
  Mat,
  connectedComponentsWithStats,
  cvtColor,
  getStructuringElement,
  inRange,
  morphologyEx
} from '@banou/opencv-wasm'

// The engine is already initialized; image is an 8-bit BGR Mat.
// "using" releases native handles at scope exit; inspect or copy outputs before then.

// 1. Allocate the alternative colour representation and the resulting selection mask.
using hsv = new Mat(), mask = new Mat()
// HSV separates hue from saturation and brightness, making a colour interval easier to choose.
cvtColor(image, hsv, COLOR_BGR2HSV)
// Lower bounds are H=25, S=40, V=0. CV_8UC3 stores three 8-bit channels.
// The fourth scalar entry is unused because this matrix has only three channels.
using low = new Mat(image.rows, image.cols, CV_8UC3, [25, 40, 0, 0])
// Upper bounds are H=95, S=255, V=255; 8-bit HSV hue ranges from 0 to 179.
// Both bound Mats are filled with the same bound triplet at every pixel.
using high = new Mat(image.rows, image.cols, CV_8UC3, [95, 255, 255, 0])
// 2. Select pixels within all three channel intervals, inclusively.
// The saturation floor excludes grayish pixels with poorly defined hue.
inRange(hsv, low, high, mask)
// Choose a small 3x3 ellipse for filling gaps in the selected colour regions.
using kernel = getStructuringElement(MORPH_ELLIPSE, { width: 3, height: 3 })
// Closing fills small holes and connects nearby selected pixels.
morphologyEx(mask, mask, MORPH_CLOSE, kernel)
// 3. Allocate component IDs, five-column region statistics and x,y centroids.
using labels = new Mat(), stats = new Mat(), centres = new Mat()
// Group the cleaned mask into connected colour regions. Label 0 is background;
// the full lab uses each region's area and bounds to filter and draw boxes.
connectedComponentsWithStats(mask, labels, stats, centres)
The snippets isolate the core operations. The complete runnable recipes also include validation, filtering, overlays, intermediate previews and resource cleanup.