Blur a selected region
Draw an area to blur while preserving the rest of the image.
The pipeline
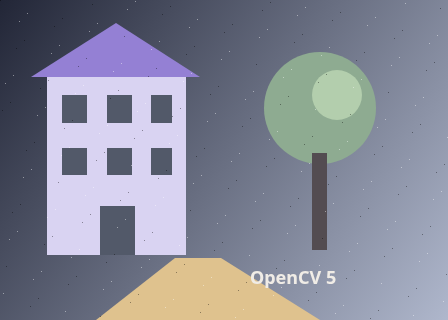
The unchanged source image. All steps use this same example.
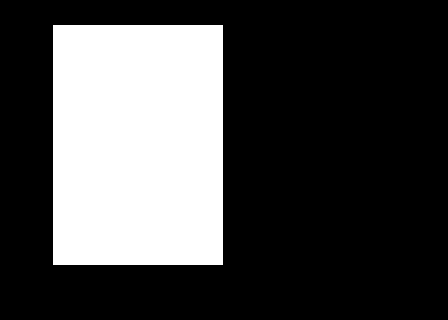
Only this rectangle will receive blurred pixels.
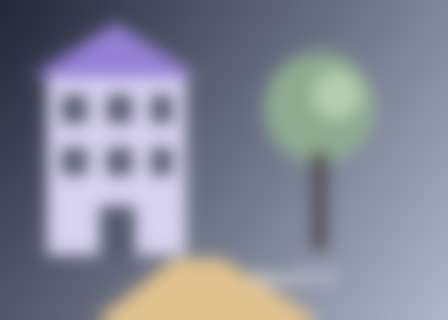
The smoothed replacement image.
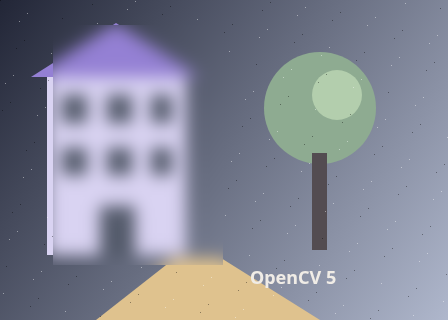
Pixels outside the selected region are unchanged.
Make a region mask
Explore the algorithm →Mat.zerosrectangleConvert the selected rectangle into a binary mask.
- Receives
- A rectangle in processed-image coordinates.
- Passes to the next step
- A binary mask: white inside the rectangle, black outside.
Why this step? Drawing white into a zero-filled 8-bit mask creates a precise write selection. Keeping the selection separate from the image lets the same masking pattern work with other effects or selection algorithms.
Blur the image
Explore the algorithm →GaussianBlurGaussian filtering builds a smooth replacement.
- Receives
- The complete original image.
- Passes to the next step
- A smooth replacement layer at the original dimensions.
Why this step? Gaussian filtering forms the replacement image. Blurring the full frame rather than only the crop provides surrounding pixels at the selection boundary and avoids treating that boundary as an artificial image edge.
Copy through the mask
Explore the algorithm →Mat.copyToOnly selected pixels receive the blurred values.
- Receives
- A copy of the original, the blurred layer and the binary mask.
- Produces
- An image with exactly the selected rectangle replaced by blurred values.
Why this step? Masked copy writes blurred pixels only where the mask is nonzero. The untouched original remains everywhere else, making the output easy to verify and the selection logic independent of the chosen effect.
Actual OpenCV 5.0.0 results on the illustrated sample, using the lab’s default algorithm settings. Masks, overlays and normalized fields are labelled previews; the data contracts above describe what the algorithms really exchange. Try this chain with your images ↓
Why this chain works
The reusable pattern is effect plus selection: make an edited version of the image, then copy only the selected pixels back. A rectangle gives the selection without needing object segmentation.
- 01
Make a region mask
Mat.zerosrectangleDrawing white into a zero-filled 8-bit mask creates a precise write selection. Keeping the selection separate from the image lets the same masking pattern work with other effects or selection algorithms.
- Receives
- A rectangle in processed-image coordinates.
- Passes on
- A binary mask: white inside the rectangle, black outside.
- 02
Blur the image
GaussianBlurGaussian filtering forms the replacement image. Blurring the full frame rather than only the crop provides surrounding pixels at the selection boundary and avoids treating that boundary as an artificial image edge.
- Receives
- The complete original image.
- Passes on
- A smooth replacement layer at the original dimensions.
- 03
Copy through the mask
Mat.copyToMasked copy writes blurred pixels only where the mask is nonzero. The untouched original remains everywhere else, making the output easy to verify and the selection logic independent of the chosen effect.
- Receives
- A copy of the original, the blurred layer and the binary mask.
- Passes on
- An image with exactly the selected rectangle replaced by blurred values.
Tune and diagnose
Choose the parameters
Sigma controls how broadly the blur averages nearby pixels. Its visual effect changes with processing resolution. To soften the rectangle boundary in your own chain, use a feathered mask and weighted blending instead of binary copy.
Read the result
The mask should match your intended region, and pixels outside it should stay identical. An abrupt transition is expected from a binary rectangle; it is not a blur failure.
Try it with your images
Choose your own image or start with the built-in sample. Use “Draw a region” and drag a rectangle on the input, or enter its coordinates. Run the recipe, then use the stage buttons to inspect intermediate results without rerunning it.
Experiment at pixel level
Draw an area to blur while preserving the rest of the image.
The engine loads on your first run. Your images stay in this browser.
Scroll over either image to zoom at the pointer. Use the scrollbars to pan both views over the same relative area. Zoom is relative to the input; pixel coordinates belong to each image. Warps can change scene correspondence.
Pixel inspector RGBA · native values · matched scale · 9 × 9 output pixels
Select a pixel
Select a pixel
Assumptions and limits
Blur strength depends on the processed resolution. The rectangular boundary remains abrupt.
TypeScript core chain
Initialize the shared engine once with await initOpenCV(), then use these named imports. In a bundled browser app, pass the WASM URL as shown in the quickstart. image is an 8-bit BGR Mat from that same engine; paired recipes receive an equally sized nextImage. Region recipes use an in-bounds pixel rect. Read outputs before the using scope ends. See matrix ownership.
import {
  CV_8U,
  GaussianBlur,
  Mat,
  rectangle
} from '@banou/opencv-wasm'

// The engine is already initialized; image is an 8-bit BGR Mat.
// rect is an in-bounds { x, y, width, height } rectangle in processed pixels.
// "using" releases native handles at scope exit; inspect or copy outputs before then.

// 1. Create an 8-bit black mask matching the image: no pixel is selected initially.
using mask = Mat.zeros(image.rows, image.cols, CV_8U)
// Allocate a blurred alternative layer and a separate final output.
using blurred = new Mat(), output = new Mat()
// Fill rect white with thickness -1. The scalar's first value is used for this
// single-channel mask, and the bottom-right pixel coordinate is inclusive.
rectangle(mask, { x: rect.x, y: rect.y },
  { x: rect.x + rect.width - 1, y: rect.y + rect.height - 1 }, [255, 0, 0, 0], -1)
// 2. Blur the entire image at sigma 8 pixels; zero kernel size is derived from sigma.
// Using the whole frame preserves neighbourhood context at the selection boundary.
GaussianBlur(image, blurred, { width: 0, height: 0 }, 8)
// 3. Start the output as an independent copy of the unmodified image.
image.copyTo(output)
// Replace only nonzero-mask pixels with blurred pixels; everything outside stays identical.
blurred.copyTo(output, mask)
The snippets isolate the core operations. The complete runnable recipes also include validation, filtering, overlays, intermediate previews and resource cleanup.