Create a transparent cutout
Draw a rectangle around the subject, refine its foreground mask with GrabCut, then export the cutout as RGBA.
The pipeline
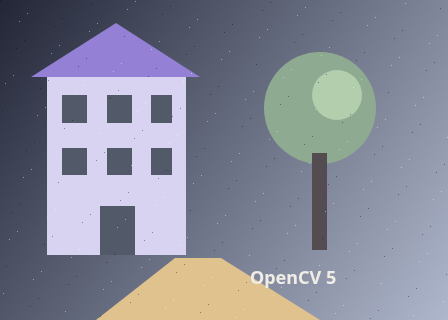
The unchanged source image. All steps use this same example.
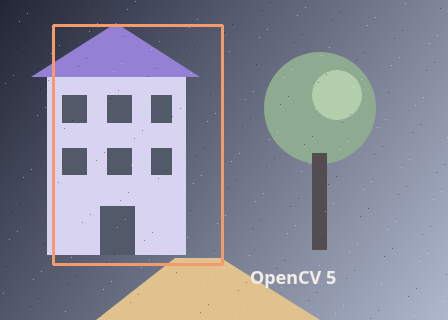
Inside the orange rectangle is possible foreground. Outside supplies known background to initialize GrabCut.
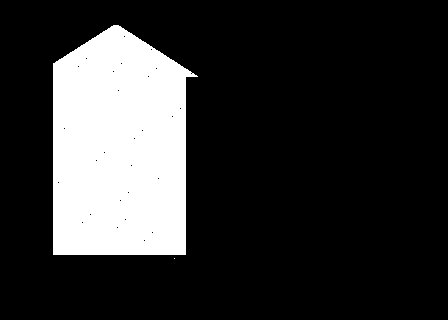
Definite and probable foreground become white.
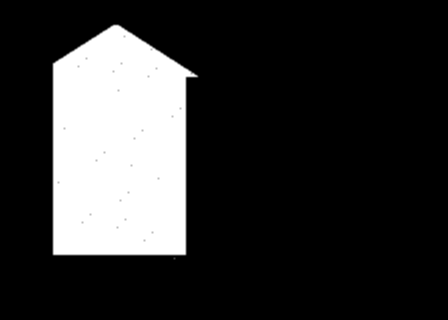
This feathered boundary controls compositing; it does not recover mixed foreground colours.
RGBA cutout. Save PNG preserves the alpha channel.
Initialize foreground models
Explore the algorithm →grabCutGC_INIT_WITH_RECTThe region interior is possible foreground; its exterior is background.
- Receives
- A colour image and a rectangle containing the entire subject.
- Passes to the next step
- An initialized four-state segmentation mask and colour-model storage.
Why this step? The rectangle gives initial evidence: pixels outside it are background, and pixels inside are candidates for foreground. This constraint allows the algorithm to learn foreground and background colour models without a manually drawn silhouette.
Refine the mask
Explore the algorithm →grabCutGC_FGDGC_PR_FGDGrabCut alternates colour models and graph cuts.
- Receives
- The initialized colour models, image and labels.
- Passes to the next step
- A binary foreground mask retaining definite and probable foreground.
Why this step? GrabCut alternates colour-model fitting with graph-cut segmentation, balancing appearance with spatial continuity. Definite and probable foreground labels are collapsed into white for compositing. Probable foreground is a discrete label, not a calibrated opacity.
Build an alpha channel
Explore the algorithm →GaussianBlurcvtColorCOLOR_BGR2RGBAOptionally soften the binary boundary and attach alpha to the original colour.
- Receives
- The foreground mask and original BGR pixels.
- Produces
- An RGBA cutout with optional soft edges.
Why this step? Optional feathering softens the binary edge. Converting colour to RGBA and writing the mask into alpha makes outside pixels transparent while preserving the original colour channels. PNG export keeps this alpha channel.
Actual OpenCV 5.0.0 results on the illustrated sample, using the lab’s default algorithm settings. Masks, overlays and normalized fields are labelled previews; the data contracts above describe what the algorithms really exchange. Try this chain with your images ↓
Why this chain works
A loose rectangle is easier to provide than an exact silhouette. GrabCut uses that initial constraint to estimate foreground, then the foreground mask becomes the image alpha channel.
- 01
Initialize foreground models
grabCutGC_INIT_WITH_RECTThe rectangle gives initial evidence: pixels outside it are background, and pixels inside are candidates for foreground. This constraint allows the algorithm to learn foreground and background colour models without a manually drawn silhouette.
- Receives
- A colour image and a rectangle containing the entire subject.
- Passes on
- An initialized four-state segmentation mask and colour-model storage.
- 02
Refine the mask
grabCutGC_FGDGC_PR_FGDGrabCut alternates colour-model fitting with graph-cut segmentation, balancing appearance with spatial continuity. Definite and probable foreground labels are collapsed into white for compositing. Probable foreground is a discrete label, not a calibrated opacity.
- Receives
- The initialized colour models, image and labels.
- Passes on
- A binary foreground mask retaining definite and probable foreground.
- 03
Build an alpha channel
GaussianBlurcvtColorCOLOR_BGR2RGBAOptional feathering softens the binary edge. Converting colour to RGBA and writing the mask into alpha makes outside pixels transparent while preserving the original colour channels. PNG export keeps this alpha channel.
- Receives
- The foreground mask and original BGR pixels.
- Passes on
- An RGBA cutout with optional soft edges.
Tune and diagnose
Choose the parameters
Keep the whole subject inside the rectangle and enough true background outside it. More iterations refine the current model but do not fix an incorrect foreground constraint. Use a small feather radius and inspect hair or fine outlines at pixel scale.
Read the result
Inspect the binary foreground before the soft mask. A smooth wrong edge is still wrong. Feathering does not recover foreground colour from mixed boundary pixels, so coloured fringes may remain when compositing onto a different background.
Try it with your images
Choose your own image or start with the built-in sample. Use “Draw a region” and drag a rectangle on the input, or enter its coordinates. Run the recipe, then use the stage buttons to inspect intermediate results without rerunning it.
Experiment at pixel level
Draw a rectangle around the subject, refine its foreground mask with GrabCut, then export the cutout as RGBA.
The engine loads on your first run. Your images stay in this browser.
Scroll over either image to zoom at the pointer. Use the scrollbars to pan both views over the same relative area. Zoom is relative to the input; pixel coordinates belong to each image. Warps can change scene correspondence.
Pixel inspector RGBA · native values · matched scale · 9 × 9 output pixels
Select a pixel
Select a pixel
Assumptions and limits
Keep the entire subject inside the rectangle and leave background outside. Feathering softens a mask; it does not recover unknown edge colours.
TypeScript core chain
Initialize the shared engine once with await initOpenCV(), then use these named imports. In a bundled browser app, pass the WASM URL as shown in the quickstart. image is an 8-bit BGR Mat from that same engine; paired recipes receive an equally sized nextImage. Region recipes use an in-bounds pixel rect. Read outputs before the using scope ends. See matrix ownership.
import {
  COLOR_BGR2RGBA,
  GC_FGD,
  GC_INIT_WITH_RECT,
  GC_PR_FGD,
  Mat,
  cvtColor,
  grabCut
} from '@banou/opencv-wasm'

// The engine is already initialized; image is an 8-bit BGR Mat.
// rect is an in-bounds { x, y, width, height } rectangle in processed pixels.
// "using" releases native handles at scope exit; inspect or copy outputs before then.

// 1. Allocate GrabCut labels and its background/foreground colour-model buffers.
// Those model Mats hold learned statistics, not preview images.
using mask = new Mat(), background = new Mat(), foreground = new Mat()
// Initialize from rect: outside is background, inside is possible foreground.
// Run three refinement iterations. Keep the entire subject inside the rectangle.
grabCut(image, mask, rect, background, foreground, 3, GC_INIT_WITH_RECT)
// 2. Allocate a four-channel image whose alpha can express transparency.
using rgba = new Mat()
// Reorder BGR into RGB and add alpha; the original colour image stays unchanged.
cvtColor(image, rgba, COLOR_BGR2RGBA)
// 3. Convert GrabCut's four discrete labels into alpha, one pixel at a time.
for (let i = 0; i < mask.data.length; i++) {
  // Read this pixel's definite/probable foreground/background classification.
  const label = mask.data[i]
  // RGBA has four bytes per pixel; offset 3 is alpha. Keep definite or probable
  // foreground opaque (255), and make background transparent (0).
  // This core example has a hard edge; the full lab optionally feathers the mask.
  rgba.data[i * 4 + 3] = label === GC_FGD || label === GC_PR_FGD ? 255 : 0
}
The snippets isolate the core operations. The complete runnable recipes also include validation, filtering, overlays, intermediate previews and resource cleanup.